编译WebAssembly版本的FFmpeg(ffmpeg.wasm):(2)使用Emscripten编译
编译WebAssembly版本的FFmpeg(ffmpeg.wasm):(2)使用Emscripten编译
作者:Jerome Wu
原文链接:Build FFmpeg WebAssembly version (= ffmpeg.wasm): Part.2 Compile with Emscripten
译者:Yodonicc
2020/9更新:修改教程,使其能在MacOS中运行。
2020/2/11更新:从这个文章的回复来看,目前下面的说明在Mac环境下无法工作。我无法解决这个问题,因为我并不拥有一台。在Mac中最简单的方法是在虚拟机中安装Linux发行版,如Ubuntu。
上一篇文章:编译WebAssembly版本的FFmpeg(ffmpeg.wasm):(1)准备
从这里开始,事情会变得更加复杂和难以理解,如果你不知道发生了什么,你可能需要谷歌背景知识(或者你可以留下回复来问我)。
另外,为了使这个教程更实用,我尽量写下我是如何解决每个问题的细节,希望它能帮助你建立你选择的库。
在这一部分中,你将学习:
-
如何使用Docker设置Emscripten的环境
-
emconfigure和emmake的用法 -
如何解决用Emscripten编译FFmpeg时的问题
如何使用Docker设置Emscripten的环境
在编译WebAssembly版本的FFmpeg(ffmpeg.wasm):(1)准备中,我们已经用GCC构建了原始版本的FFmpeg,现在我们转而使用Emscripten。
我们要使用的Emscripten版本是1.39.18(trzeci/emscripten:1.39.18-upstream),你可以通过官方教程安装Emscripten(在本教程中,我们在MacOS中使用setup-emsdk Github Actions)或者从docker hub拉取Emscripten镜像。
$ docker pull trzeci/emscripten:1.39.18-upstream
这可能需要几分钟的时间,因为其大小约为1GB。
然后我们需要更新build-with-docker.sh,如下所示:
#!/bin/bash -x

EM_VERSION=1.39.18-upstream

docker pull trzeci/emscripten:$EM_VERSION
docker run \
  -v $PWD:/src \
  -v $PWD/cache-wasm:/emsdk_portable/.data/cache/wasm \
  trzeci/emscripten:$EM_VERSION \
  sh -c 'bash ./build.sh'
第8行’-v $PWD/cache-wasm:/emsdk_portable/.data/cache/wasm’不是必须的,但它可以帮助你在后续的构建中加快速度。
接下来我们要做的是找到用emscripten编译FFmpeg的配置,这是一个尝试和错误的过程,需要搜索文档和保持耐心。
emconfigure和emmake &的用法以及如何解决用Emscripten编译FFmpeg的问题
让我们开始寻找正确配置的旅程。在上一篇文章中,它以./configure --disable-x86asm开始,要用emscripten做,你需要把它改为emconfigure ./configure --disable-x86asm。(关于emconfigure的细节,请查看这里),由于我们要进行交叉编译,我们需要添加交叉编译的标志来明确告诉FFmpeg。
让我们更新build.sh,如下所示。
#!/bin/bash -x

# verify Emscripten version
emcc -v

# configure FFMpeg with Emscripten
ARGS=(
  --target-os=none        # use none to prevent any os specific configurations
  --arch=x86_32           # use x86_32 to achieve minimal architectural optimization
  --enable-cross-compile  # enable cross compile
  --disable-x86asm        # disable x86 asm
)
emconfigure ./configure "${ARGS[@]}"
神奇的是,没有任何错误或任何不妥之处,那么我们是否只需要输入emmake make -j就可以得到FFmpeg.wasm?不幸的是,答案是否定的。emconfigure最重要的任务之一是将编译器从gcc替换成emcc(或g++替换成em++),但在./configure的输出中,我们仍然得到gcc作为我们的编译器。
emscripten sdl2-config called with /emsdk_portable/emscripten/tag-1.38.45/system/bin/sdl2-config --cflags
emscripten sdl2-config called with /emsdk_portable/emscripten/tag-1.38.45/system/bin/sdl2-config --libs
install prefix            /usr/local
source path               .
C compiler                gcc             # Should be emcc
C library                 glibc
ARCH                      x86 (generic)
big-endian                no
runtime cpu detection     yes
standalone assembly       no
x86 assembler             nasm
每个自动化工具都有其局限性,在这种情况下我们需要手动操作。让我们检查一下是否有任何参数可以拯救我们。
$ ./configure --help
在Toolchain选项下,有一些参数用来指定要使用的编译器。
root@57ab95def750:/src# ./configure --help
Usage: configure [options]
Options: [defaults in brackets after descriptions]
Help options:
...
Toolchain options:
...
  --nm=NM                  use nm tool NM [nm -g]
  --ar=AR                  use archive tool AR [ar]
  --as=AS                  use assembler AS []
  --ln_s=LN_S              use symbolic link tool LN_S [ln -s -f]
  --strip=STRIP            use strip tool STRIP [strip]
  --windres=WINDRES        use windows resource compiler WINDRES [windres]
  --x86asmexe=EXE          use nasm-compatible assembler EXE [nasm]
  --cc=CC                  use C compiler CC [gcc]
  --cxx=CXX                use C compiler CXX [g++]
  --objcc=OCC              use ObjC compiler OCC [gcc]
  --dep-cc=DEPCC           use dependency generator DEPCC [gcc]
  --nvcc=NVCC              use Nvidia CUDA compiler NVCC [nvcc]
  --ld=LD                  use linker LD []
...
让我们在build.sh中传递这些参数来用emscripten进行编译。
#!/bin/bash -x

# verify Emscripten version
emcc -v

# configure FFMpeg with Emscripten
FLAGS=(
  --target-os=none        # use none to prevent any os specific configurations
  --arch=x86_32           # use x86_32 to achieve minimal architectural optimization
  --enable-cross-compile  # enable cross compile
  --disable-x86asm        # disable x86 asm
  --nm="llvm-nm"
  --ar=emar
  --ranlib=emranlib
  --cc=emcc
  --cxx=em++
  --objcc=emcc
  --dep-cc=emcc
)
emconfigure ./configure "${FLAGS[@]}"
对于本地构建,请确保
llvm-ranlib、llvm-as和llvm-nm存在。如果没有,你可以在$EMSDK_ROOT/upstream/bin中找到它们。
有了这些参数,./configure将需要更多的时间来运行,但你最终会得到想要的输出。
emscripten sdl2-config called with /emsdk_portable/emscripten/tag-1.39.18/system/bin/sdl2-config --cflags
emscripten sdl2-config called with /emsdk_portable/emscripten/tag-1.39.18/system/bin/sdl2-config --libs
install prefix            /usr/local
source path               .
C compiler                emcc         # emcc as expected
C library
ARCH                      x86 (generic)
big-endian                no
runtime cpu detection     yes
standalone assembly       no
在build.sh的结尾处添加emmake make -j4(你可以将并行性提高到像-j8那样,或者干脆使用-j来使用所有内核):
#!/bin/bash -x

# verify Emscripten version
emcc -v

# configure FFMpeg with Emscripten
ARGS=(
  --target-os=none        # use none to prevent any os specific configurations
  --arch=x86_32           # use x86_32 to achieve minimal architectural optimization
  --enable-cross-compile  # enable cross compile
  --disable-x86asm        # disable x86 asm
  --nm="llvm-nm"
  --ar=emar
  --ranlib=emranlib
  --cc=emcc
  --cxx=em++
  --objcc=emcc
  --dep-cc=emcc
)
emconfigure ./configure "${ARGS[@]}"

# build ffmpeg.wasm
emmake make -j4
然后它运行完立马报错:
...
./libavutil/x86/timer.h:39:24: error: invalid output constraint '=a' in asm
                     : "=a" (a), "=d" (d));
                       ^
从输出信息中,我们可以确定这个错误与asm有关。打开./libavutil/x86/timer.h,我们可以确认这个问题是由x86内联程序引起的,它与WebAssembly不兼容,所以解决办法是在build.sh中禁用它。
#!/bin/bash -x

# verify Emscripten version
emcc -v

# configure FFMpeg with Emscripten
ARGS=(
  --target-os=none        # use none to prevent any os specific configurations
  --arch=x86_32           # use x86_32 to achieve minimal architectural optimization
  --enable-cross-compile  # enable cross compile
  --disable-x86asm        # disable x86 asm
  --disable-inline-asm    # disable inline asm
  --nm="llvm-nm"
  --ar=emar
  --ranlib=emranlib
  --cc=emcc
  --cxx=em++
  --objcc=emcc
  --dep-cc=emcc
)
emconfigure ./configure "${ARGS[@]}"

# build ffmpeg.wasm
emmake make -j4
它可以工作,并且一直在编译,直到我们遇到另一个错误。
...
CC libavfilter/dnn/dnn_backend_native_layers.o
In file included from libavfilter/aeval.c:26:
In file included from ./libavutil/avassert.h:31:
In file included from ./libavutil/avutil.h:296:
In file included from ./libavutil/common.h:533:
In file included from ./libavutil/internal.h:176:
./libavutil/libm.h:54:32: error: static declaration of 'cbrt' follows non-static declaration
static av_always_inline double cbrt(double x)
                               ^
/emsdk_portable/upstream/emscripten/system/include/libc/math.h:151:13: note: previous declaration is here
double      cbrt(double);
            ^
In file included from libavfilter/aeval.c:26:
这一次,根本原因不是那么明显,所以我们需要在./configure过程中深入挖掘出错的原因。一个非常有用的文件是ffbuild/config.log,它包含了./configure期间的日志,大多数时候你可以在那里找到根本原因。
通过在config.log中搜索cbrt,我们发现了以下错误信息:
...
check_mathfunc cbrt 1                                                                                                                             test_ld cc                                                                                                                                        test_cc                                                                                                                                           BEGIN /tmp/ffconf.syfN4Irw/test.c                                                                                                                     1 #include <math.h>                                                                                                                               2 float foo(float f, float g) { return cbrt(f); }
    3 int main(void){ return (int) foo; }
END /tmp/ffconf.syfN4Irw/test.c
emcc -D_ISOC99_SOURCE -D_FILE_OFFSET_BITS=64 -D_LARGEFILE_SOURCE -D_POSIX_C_SOURCE=200112 -D_XOPEN_SOURCE=600 -std=c11 -fomit-frame-pointer -pthread -c -o /tmp/ffconf.syfN4Irw/test.o /tmp/ffconf.syfN4Irw/test.c                                                                                  emcc -Wl,-z,noexecstack -o /tmp/ffconf.syfN4Irw/test /tmp/ffconf.syfN4Irw/test.o                                                                  wasm-ld: error: 'atomics' feature is used by /tmp/ffconf.syfN4Irw/test.o, so --shared-memory must be used
...
这个测试试图检查cbrt是否在工作,但由于atomics功能出错而失败。atomics是在你使用pthread时被询问的,所以让我们添加pthread标志。(关于pthread标志的更多细节请看这里)
更新build.sh:
#!/bin/bash -x

# verify Emscripten version
emcc -v

# configure FFMpeg with Emscripten
CFLAGS="-s USE_PTHREADS"
LDFLAGS="$CFLAGS"
ARGS=(
  --target-os=none        # use none to prevent any os specific configurations
  --arch=x86_32           # use x86_32 to achieve minimal architectural optimization
  --enable-cross-compile  # enable cross compile
  --disable-x86asm        # disable x86 asm
  --disable-inline-asm    # disable inline asm
  --extra-cflags="$CFLAGS"
  --extra-cxxflags="$CFLAGS"
  --extra-ldflags="$LDFLAGS"
  --nm="llvm-nm"
  --ar=emar
  --ranlib=emranlib
  --cc=emcc
  --cxx=em++
  --objcc=emcc
  --dep-cc=emcc
)
emconfigure ./configure "${ARGS[@]}"

# build ffmpeg.wasm
emmake make -j4
它可以工作,并且一直在编译,直到我们遇到另一个错误:
...
LD      ffplay_g                                                                                                                                  emcc: warning: ignoring unsupported linker flag: `-rpath-link=:libpostproc:libswresample:libswscale:libavfilter:libavdevice:libavformat:libavcodec:libavutil:libavresample` [-Wlinkflags]
7 warnings generated.
wasm-ld: error: initial memory too small, 19491744 bytes needed
...
make: *** [Makefile:114: ffplay_g] Error 1
make: *** Waiting for unfinished jobs....
emcc: warning: ignoring unsupported linker flag: `-rpath-link=:libpostproc:libswresample:libswscale:libavfilter:libavdevice:libavformat:libavcodec
:libavutil:libavresample` [-Wlinkflags]
...
这次的问题是由于初始内存太小(Emscripten默认只有16MB,而这里最小的是19+MB),所以我们需要通过-s INITIAL_MEMORY=33554432(32MB)来提高初始内存的值。
#!/bin/bash -x

# verify Emscripten version
emcc -v

# configure FFMpeg with Emscripten
CFLAGS="-s USE_PTHREADS"
LDFLAGS="$CFLAGS -s INITIAL_MEMORY=33554432" # 33554432 bytes = 32 MB
ARGS=(
  --target-os=none        # use none to prevent any os specific configurations
  --arch=x86_32           # use x86_32 to achieve minimal architectural optimization
  --enable-cross-compile  # enable cross compile
  --disable-x86asm        # disable x86 asm
  --disable-inline-asm    # disable inline asm
  --extra-cflags="$CFLAGS"
  --extra-cxxflags="$CFLAGS"
  --extra-ldflags="$LDFLAGS"
  --nm="llvm-nm"
  --ar=emar
  --ranlib=emranlib
  --cc=emcc
  --cxx=em++
  --objcc=emcc
  --dep-cc=emcc
)

emconfigure ./configure "${ARGS[@]}"

# build ffmpeg.wasm
emmake make -j4
在这次修复后,仍然有一个错误:
LD      ffplay_g
emcc: warning: ignoring unsupported linker flag: `-rpath-link=:libpostproc:libswresample:libswscale:libavfilter:libavdevice:libavformat:libavcodec:libavutil:libavresample` [-Wlinkflags]
6 warnings generated.
LD      ffmpeg_g
emcc: warning: ignoring unsupported linker flag: `-rpath-link=:libpostproc:libswresample:libswscale:libavfilter:libavdevice:libavformat:libavcodec:libavutil:libavresample` [-Wlinkflags]
9 warnings generated.
LD      ffprobe_g
emcc: warning: ignoring unsupported linker flag: `-rpath-link=:libpostproc:libswresample:libswscale:libavfilter:libavdevice:libavformat:libavcodec:libavutil:libavresample` [-Wlinkflags]
STRIP   ffmpeg
strip:ffmpeg_g: file format not recognized
make: *** [Makefile:107: ffmpeg] Error 1
make: *** Waiting for unfinished jobs....
由于我们无法剥离(因为它不是有效的二进制格式),让我们简单地用--disable-stripping禁止剥离,然后重新制作。
#!/bin/bash -x

# verify Emscripten version
emcc -v

# configure FFMpeg with Emscripten
CFLAGS="-s USE_PTHREADS"
LDFLAGS="$CFLAGS -s INITIAL_MEMORY=33554432" # 33554432 bytes = 32 MB
ARGS=(
  --target-os=none        # use none to prevent any os specific configurations
  --arch=x86_32           # use x86_32 to achieve minimal architectural optimization
  --enable-cross-compile  # enable cross compile
  --disable-x86asm        # disable x86 asm
  --disable-inline-asm    # disable inline asm
  --disable-stripping     # disable stripping
  --extra-cflags="$CFLAGS"
  --extra-cxxflags="$CFLAGS"
  --extra-ldflags="$LDFLAGS"
  --nm="llvm-nm"
  --ar=emar
  --ranlib=emranlib
  --cc=emcc
  --cxx=em++
  --objcc=emcc
  --dep-cc=emcc
)

emconfigure ./configure "${ARGS[@]}"

# build ffmpeg.wasm
emmake make -j4
最后我们成功地完成了emmake make -j部分,你可以看到ffplay / ffplay_g、ffprobe / ffprobe_g和ffmpeg / ffmpeg_g在根文件夹中生成。它看起来很完美,但有一个奇怪的_g后缀使输出文件像这样。
- ffmpeg
- ffmpeg_g
- ffmpeg_g.wasm
- ffmpeg_g.worker.js
这里的ffmpeg和ffmpeg_g都是实际的js文件,理想的命名方式如下:
- ffmpeg / ffmpeg_g => ffmpeg.js
- ffmpeg_g.wasm => ffmpeg.wasm
- ffmpeg_g.worker.js => ffmpeg.worker.js
为了解决这个问题,我们需要自己来构建它。建立ffmpeg的命令可以通过运行emmake make -n来提取。
...
printf "LD\t%s\n" ffmpeg_g; emcc -Llibavcodec -Llibavdevice -Llibavfilter -Llibavformat -Llibavresample -Llibavutil -Llibpostproc -Llibswscale -Llibswresample -Wl,--as-needed -Wl,-z,noexecstack -Wl,--warn-common -Wl,-rpath-link=libpostproc:libswresample:libswscale:libavfilter:libavdevice:libavformat:libavcodec:libavutil:libavresample -Qunused-arguments   -o ffmpeg_g fftools/ffmpeg_opt.o fftools/ffmpeg_filter.o fftools/ffmpeg_hw.o fftools/cmdutils.o fftools/ffmpeg.o  -lavdevice -lavfilter -lavformat -lavcodec -lswresample -lswscale -lavutil  -lm -pthread -lm -lm -pthread -lm -lm -lm -pthread -lm
printf "CP\t%s\n" ffmpeg; cp -p ffmpeg_g ffmpeg
...
再加上下面的命令:
emcc \
  -I. -I./fftools \
  -Llibavcodec -Llibavdevice -Llibavfilter -Llibavformat -Llibavresample -Llibavutil -Llibpostproc -Llibswscale -Llibswresample \
  -Qunused-arguments \
  -o ffmpeg_g fftools/ffmpeg_opt.o fftools/ffmpeg_filter.o fftools/ffmpeg_hw.o fftools/cmdutils.o fftools/ffmpeg.o \
  -lavdevice -lavfilter -lavformat -lavcodec -lswresample -lswscale -lavutil -lm
由于我们正在构建自己的版本,让我们在./configure步骤中添加--disable-programs和--disable-doc,以加快构建速度,同时在构建ffmpeg时添加一些必要的标志。
#!/bin/bash -x

# verify Emscripten version
emcc -v

# configure FFMpeg with Emscripten
CFLAGS="-s USE_PTHREADS"
LDFLAGS="$CFLAGS -s INITIAL_MEMORY=33554432" # 33554432 bytes = 32 MB
CONFIG_ARGS=(
  --target-os=none        # use none to prevent any os specific configurations
  --arch=x86_32           # use x86_32 to achieve minimal architectural optimization
  --enable-cross-compile  # enable cross compile
  --disable-x86asm        # disable x86 asm
  --disable-inline-asm    # disable inline asm
  --disable-stripping     # disable stripping
  --disable-programs      # disable programs build (incl. ffplay, ffprobe & ffmpeg)
  --disable-doc           # disable doc
  --extra-cflags="$CFLAGS"
  --extra-cxxflags="$CFLAGS"
  --extra-ldflags="$LDFLAGS"
  --nm="llvm-nm"
  --ar=emar
  --ranlib=emranlib
  --cc=emcc
  --cxx=em++
  --objcc=emcc
  --dep-cc=emcc
)
emconfigure ./configure "${CONFIG_ARGS[@]}"

# build dependencies
emmake make -j4

# build ffmpeg.wasm
mkdir -p wasm/dist
ARGS=(
  -I. -I./fftools
  -Llibavcodec -Llibavdevice -Llibavfilter -Llibavformat -Llibavresample -Llibavutil -Llibpostproc -Llibswscale -Llibswresample
  -Qunused-arguments
  -o wasm/dist/ffmpeg.js fftools/ffmpeg_opt.c fftools/ffmpeg_filter.c fftools/ffmpeg_hw.c fftools/cmdutils.c fftools/ffmpeg.c
  -lavdevice -lavfilter -lavformat -lavcodec -lswresample -lswscale -lavutil -lm
  -s USE_SDL=2                    # use SDL2
  -s USE_PTHREADS=1               # enable pthreads support
  -s INITIAL_MEMORY=33554432      # 33554432 bytes = 32 MB
)
emcc "${ARGS[@]}"
让我们创建一个basic.html来测试ffmpeg.wasm是否在工作。
<!DOCTYPE html>
<html lang="en">
<head>
  <meta charset="UTF-8">
  <title></title>
  <script src="./dist/ffmpeg.js"></script>
</head>
<body>
</body>
</html>
运行一个轻量级的网络服务器(例如python3 -m http.server 3000)并访问网页(例如http://localhost:3000/basic.html),然后打开Chrome DevTools。
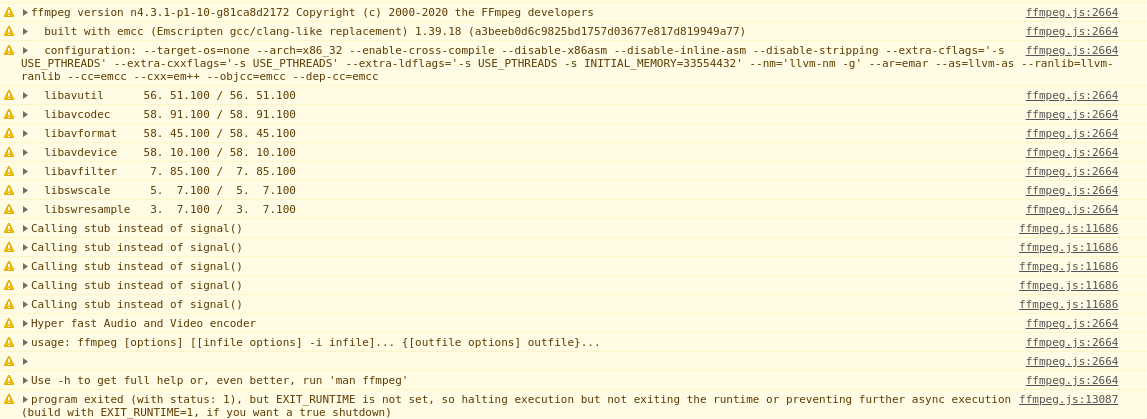
你可以看到它的输出与原来的FFmpeg相似,它给了我们一个很好的起点来打磨我们的ffmpeg.wasm库。
你可以在这里访问资源库,看看它是如何工作的:https://github.com/ffmpegwasm/FFmpeg/tree/n4.3.1-p2
也可以在这里下载构建的工件:https://github.com/ffmpegwasm/FFmpeg/releases/tag/n4.3.1-p2
关于如何打磨和创建一个 “真正的 “ffmpeg.wasm库,请关注编译WebAssembly版本的FFmpeg( ffmpeg.wasm):(3) ffmpeg.wasm v0.1 - 将avi转为mp4的新一篇文章。😃
注:特别感谢技术指导dazhao(赵达)对本文翻译的审阅指正。
我的博客即将同步至腾讯云+社区,邀请大家一同入驻:https://cloud.tencent.com/developer/support-plan?invite_code=38vev0ndgtogc